


Updating the firmware on a DVB-T2 set-top box should always be done with extreme care. Even a small mistake during the update process can render the receiver unusable, and repairing it may require specialized equipment or professional service. Before you begin, carefully read the firmware update instructions to avoid damaging your receiver.
Important Information
Always use firmware designed specifically for your DVB-T2 (or DVB-T) receiver model. Installing firmware intended for another device may cause your receiver to stop working.
While the firmware is being installed:
- Do not interrupt the update process.
- Do not remove the USB flash drive.
- Do not disconnect the receiver from the power supply.
- Wait until the receiver has completely restarted before removing the USB flash drive.
Before updating your receiver, it is highly recommended to read this guide, which explains the most important firmware precautions. If the update fails and your DVB-T2 or satellite receiver no longer starts, this article explains several methods that can help restore the device.
How to Update a DVB-T2 Set-Top Box from a USB Flash Drive
Download the correct firmware for your DVB-T2 set-top box model. You can search for it online or check this section to see whether a newer firmware version is available for your receiver.
Copy the firmware file to a USB flash drive. For the best compatibility, the flash drive should be formatted using the FAT32 file system, as some receivers cannot recognize NTFS or other file systems.
Insert the USB flash drive containing the firmware into the USB port of your DVB-T2 set-top box.
Press the Menu button on your remote control to open the receiver menu.
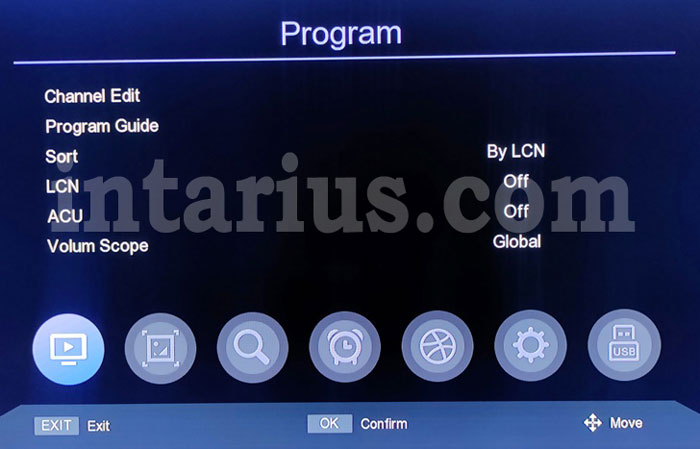
Open the System menu.
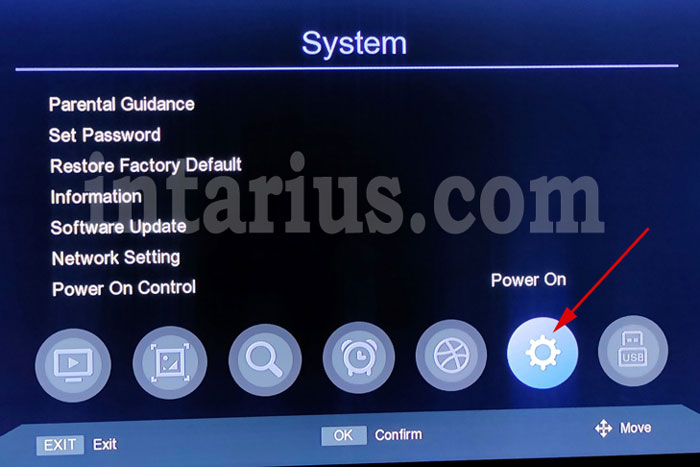
Select Software Update and press OK.
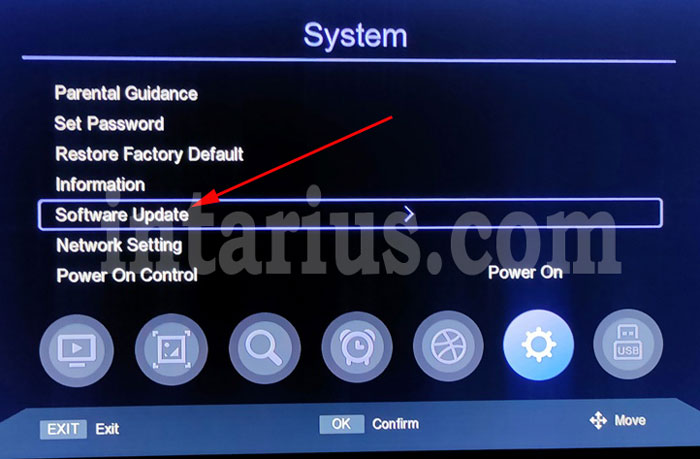
Select USB Update and press OK.
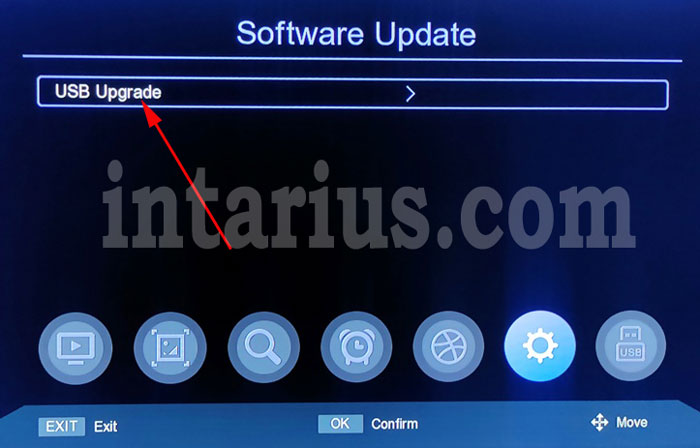
Under Update Type, select USB Update.
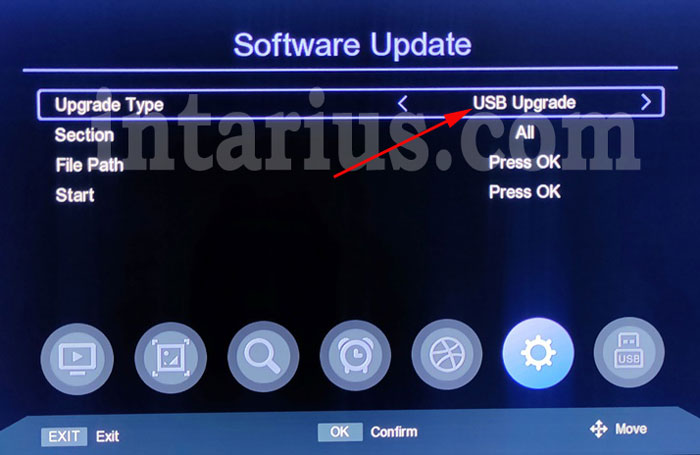
Next, open the File Path option.
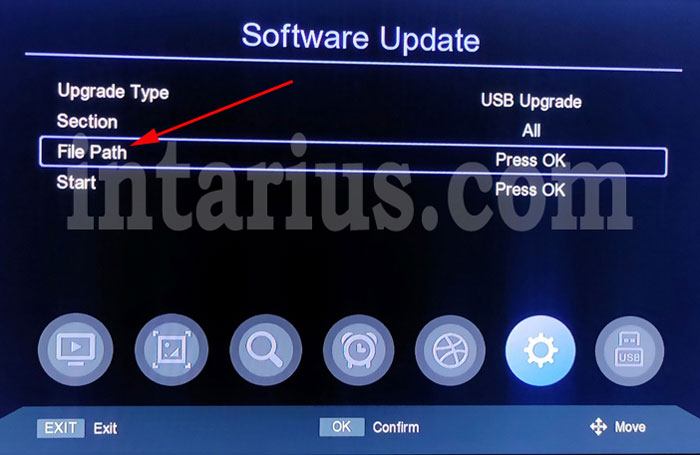
A new window will appear. Select your USB flash drive and open it.
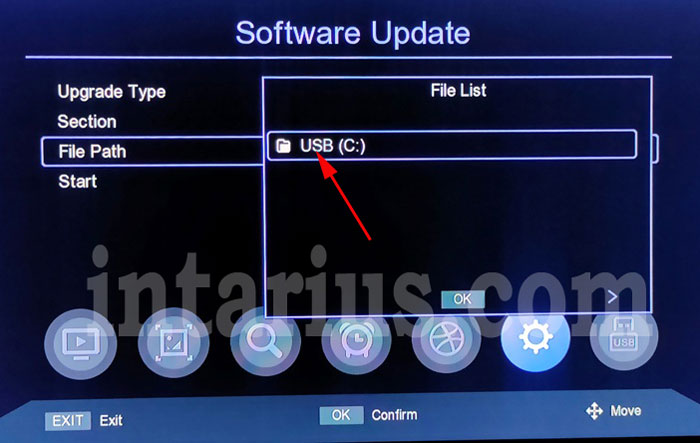
Open the USB flash drive and locate the firmware file for your DVB-T2 set-top box. In this example, the firmware file has a .bin extension, but your receiver may use a different file format. Select the firmware file and confirm your choice by pressing OK on the remote control.
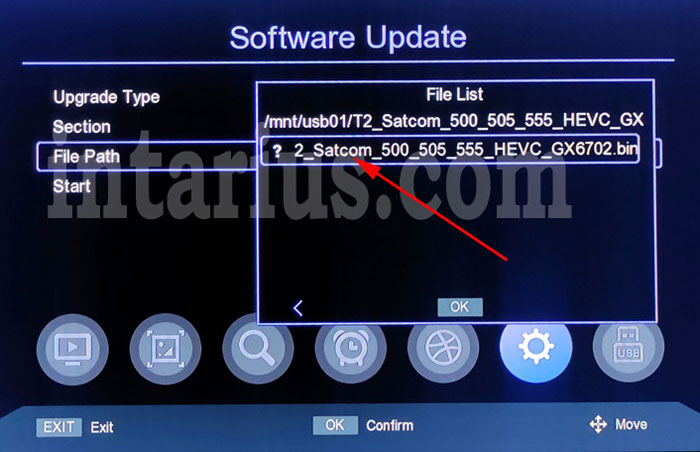
The File Path field will now display the location of the selected firmware file along with its filename.
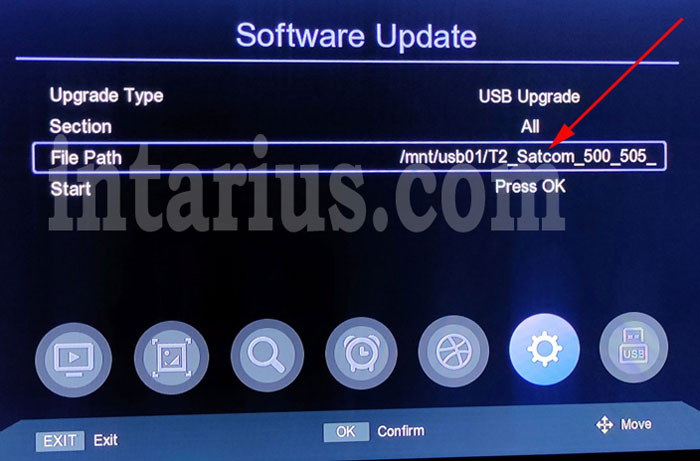
Select Update (Start) and press the OK button on the remote control.
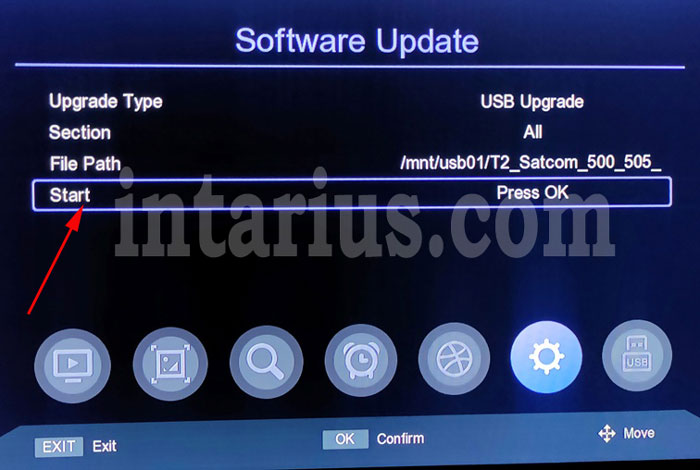
The firmware update process will now begin. Please wait until it is fully completed. During this time, do not remove the USB flash drive or disconnect the receiver from the power supply. Interrupting the update may damage the firmware and prevent the receiver from starting correctly. The entire process usually takes only one or two minutes.
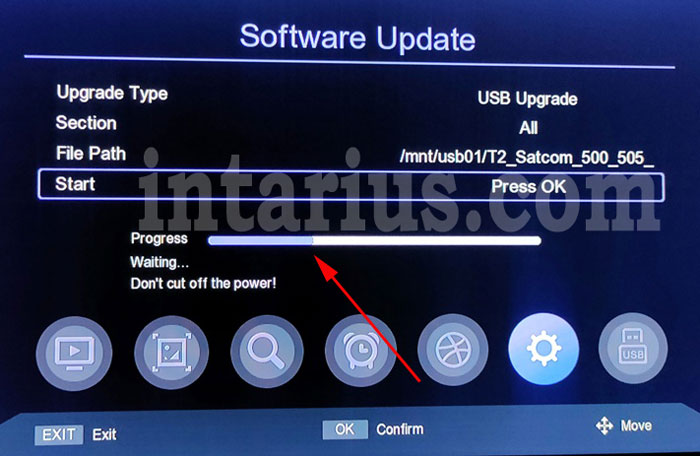
When the firmware update is complete, the DVB-T2 receiver will restart automatically.

After the receiver has restarted, the initial setup screen will appear. Only after the reboot is complete should you remove the USB flash drive from the receiver.
Choose your TV broadcast standard: DVB-T2 or DVB-T. Some receivers combine both standards into a single option labeled DVB-T/T2.
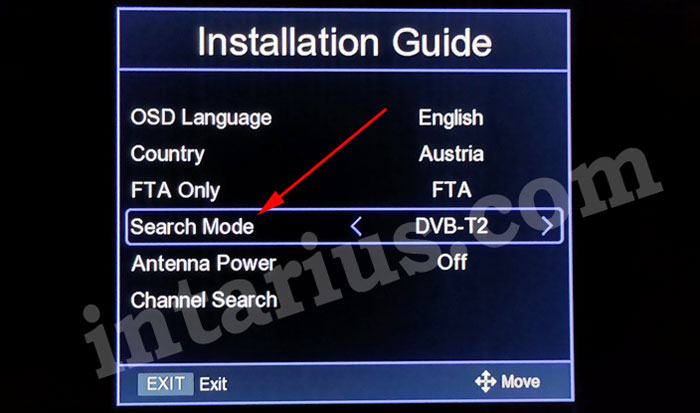
Open the Auto Search menu and press OK. On some receiver models, channel scanning starts automatically after a few seconds.
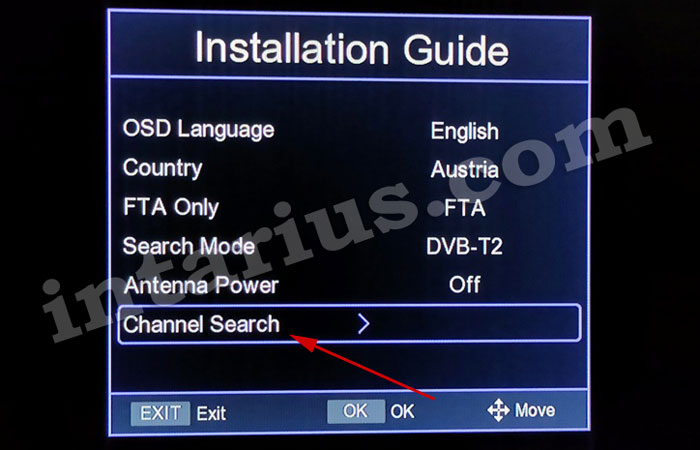
The receiver will begin scanning for available TV channels. Wait until the search is complete. All detected channels will be saved automatically.
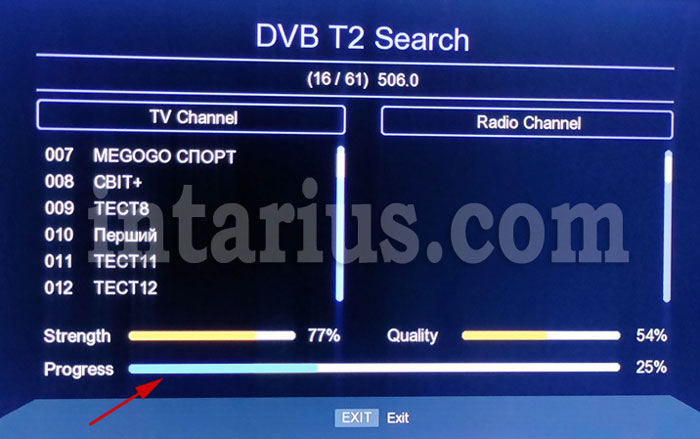
Once the scan is finished, your TV channels will be available, and the firmware update process is complete.

You’re Ready to Go
Your DVB-T2 receiver has now been successfully updated with the latest firmware. If everything was done correctly, the receiver should operate normally with the new software installed. Should you experience any issues after the update, verify that the correct firmware version was used or restore the receiver using the recovery methods described earlier.